Join Our Ford Truck Forum Today

Document your Ford truck project here and inspire others! Login/Register to view the site with fewer ads.

Buzz's 460 upgrade

1,320
82
Just to add, DO NOT use your torque wrenches as breaker bars, and DO NOT store your click type wrenches with tension on them.

If you read a snap-on torque wrench manual, it states that you should set to and cycle your wrench @ 50% of full wrench torque in both directions before use.

Another no-no is "double clicking" after you hit the set torque. If you must, you need to ratchet the wrench before another cycle. You may bend the rod that makes the audible click, as it is under tension until you ratchet the wrench.

Oh, and no extensions!! Deep sockets only when a short socket won't work!


Just some good info that everybody should practice. :)

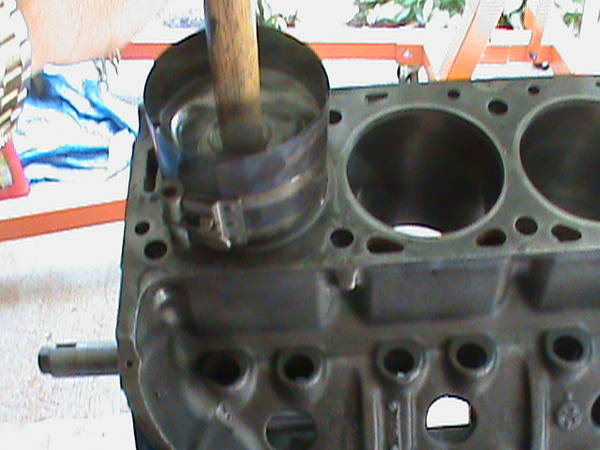
Professionals use ring expanders buzz, not amateurs. ;)

Very easy to distort the ring, not allowing it to sit flat and true in the ring land.
 
Last edited:

BuzzGun79

Nov.TOTM 2012 / 2012 TOTY
2,388
55
Very good info here Guys!!...YelloThumbUp

And Derick....If you would like to fork over the cash...Ill stock up on my tools...lol..j/k..:) smilieFordlogo
 

BuzzGun79

Nov.TOTM 2012 / 2012 TOTY
2,388
55
Due to the fact of my parents declining health....this thread will be continued at a later time....I ask for your thoughts and prayers...in our families time of need..
Thank You..Respectfully!!!
Bob
 

taxreliever

Licensed to Represent!
14,695
287
Maine
Bob, what Roy said.....sorry to hear....prayers from here for sure.
 

BuzzGun79

Nov.TOTM 2012 / 2012 TOTY
2,388
55
Thanks Guys...sorry i havnt been around much lately.....just got a great deal on the plate right now as you can imagine...Mom is hangin in there...
 

BuzzGun79

Nov.TOTM 2012 / 2012 TOTY
2,388
55
Now...back to the build....

Remember the "Tang Rule" i spoke of...it applies to the installation of the Main bearing halves as we lay them in thier respective saddles...

460_ENGINE_ASSEMBLY_003.JPG


Same with the main caps....tang to tang and you wont go wrong.....

460_ENGINE_ASSEMBLY_009.JPG


This pic shows installation of the bearing..along with the upper rear main seal half

460_ENGINE_ASSEMBLY_004.JPG


Our main caps....

460_ENGINE_ASSEMBLY_008.JPG


the completed upper bearing installation.......

460_ENGINE_ASSEMBLY_005.JPG
 
Last edited:

BuzzGun79

Nov.TOTM 2012 / 2012 TOTY
2,388
55
Next up using our Napa brand.....

460_ENGINE_ASSEMBLY_006.JPG


for assembly lube...we will coat ALL the bearing halves....then lay in the Crankshaft...once seated we place the main caps back on in order and torque from the center and work our way out making 3 total passes to ensure proper torque....

460_ENGINE_ASSEMBLY_007.JPG


The "Tang rule" applies to the rod bearings as well....

460_ENGINE_ASSEMBLY_014.JPG


rod cap below......

460_ENGINE_ASSEMBLY_020.JPG


we will soak the piston in 10-30 clean oil.....along with placeing 2 pieces of 3/8 hose over the rod studs...this will keep from nicking the crankshaft upon reinstallation of the rod assembly

460_ENGINE_ASSEMBLY_013.JPG


Next "I" use........

460_ENGINE_ASSEMBLY_011.JPG


To coat down cylinder walls..before rod installation...why STP Oil treatment? ....simple its thick base makes it excellant for bonding to metal surfaces and it will stay much longer than conventional oil..being this engine wont be fired off for some time yet...

460_ENGINE_ASSEMBLY_012.JPG


Here weve placed our ring compressor around the unit...tightend the tool...and begin to drive in the piston using a wooden handle of the hammer...which way did that piston notch go?.....To the front of the engine!!

460_ENGINE_ASSEMBLY_017.JPG


460_ENGINE_ASSEMBLY_018.JPG


460_ENGINE_ASSEMBLY_019.JPG


Once the rod is seated on the crank journal..place the rod cap on so the number can be read from one side...remember tang to tang relationship...Now "I" Install all the units before torqueing them up to specs...again i will make 3 passes to ensure proper torque...I will also rotate the engine 1 complete revolution upon torqeing each rod assembly before moving on to the next....

460_ENGINE_ASSEMBLY_022.JPG


Our Main and Rod bearings manufactored by....

460_ENGINE_ASSEMBLY_021.JPG


Available at......

460_block_prep_011.JPG


smilieFordlogo
 
Last edited:

BuzzGun79

Nov.TOTM 2012 / 2012 TOTY
2,388
55
Ok Lets get this Bottom end Completed....Here i have the oil pump/dist shaft ready for the engine...

460_final_assemblie_001.JPG


460_final_assemblie_003.JPG


Our pump is installed

460_final_assemblie_002.JPG


along with the Oil pan...using new Felpro gaskets of course..

460_final_assemblie_004.JPG


460_final_assemblie_005.JPG
 

BuzzGun79

Nov.TOTM 2012 / 2012 TOTY
2,388
55
Next ive laid our Com Cam next to the old stocker...just to compare..and inspect the differences between the two

460_final_assemblie_006.JPG


Comp Supplies its own ASSEMBLY LUBE FOR CAM BREAKIN..it is applied on ALL CAM LOBES ALONG WITH LIFTERS..LIFTER BOTTOMS

460_final_assemblie_007.JPG


Wala....our New Comp Cam is in the engine....

460_final_assemblie_008.JPG


Ok Next....Doug here you go..a little timing chain/gear 101
Now ive lined up my cam gears mark bottom center..to coinside with the crank gears mark top center...Now the crank gear has three keyways 1 is for 4* retarded..the second is for "Straight up timing" the third 4* advanced...we will use the center keyway..being straight up timing and is identified with a dot above the keyway..this is the timing mark i will use to line up with the cam gear...

460_final_assemblie_011.JPG


460_final_assemblie_010.JPG


Once my marks are inline....I remove the cam gear...and complete gear chain instalation.....

460_final_assemblie_013.JPG


Now if you take close look ...we are in correct engine timing with our instaltion of our timing gear set..notice #1 piston is at TDC which is where it should be...The distributor will be installed later...pointing the rotor to the number 1 cap terminal...

460_final_assemblie_015.JPG


Well that pretty well wraps up this basic build...weve got our engine ready to go back in the vehicle..there it will be fully dressed and completed in the coming days.....

460_final_assemblie_016.JPG


The Cam Specs....

460_final_assemblie_018.JPG


The cost of this perticular build....

460_bills_001.JPG


1) Cam kit...includes cam.lifters,springs,keepers.....424.95

2)Cam bearing kit.............................................. 31.95

3) Re-ring kit.....includeds rings rod/main bearings,
Felpro Gaskets....................................................216.95

4) Napa water pump 38.99
8 new plugs 23.92
castrol GTX 10-40 41.88
Oil Filter 8.85
Anti Freeze 12.69
Engine mounts 119.00
-------------
919.00 smilieFordlogo
 

BuzzGun79

Nov.TOTM 2012 / 2012 TOTY
2,388
55
For those interested here is the Cam's Profile for this engine.......

Comp Cams part # 34-235-4
Cam Grind FF X4 262-11
Gross Valve lift Intake .514 exhaust .524
Duration @ .006 Tappet lift Intake 262 exhaust 270
Valve timing open @ .006 Int. 24 BTDC 58 ABDC Exh. 70 BBDC 20 ATDC
These specs are for cam installed @ 107.0 Intake center line
Duration- Intake @ .050 218 Exhaust 226
Lobe lift Intake .2970 Exhaust .3030
Lobe seperation 111.0


There you go Chris......it should be a mild thumper for sure....Now the tech i spoke with told me it should have a pretty decent good low - midrange pull to it...along with working well with a stock torque converter and my automatic transmissions current configuration...
 

BuzzGun79

Nov.TOTM 2012 / 2012 TOTY
2,388
55
Well Shes..."Back in the saddles"........Again....

460_back_in_the_rig_002.JPG


460_back_in_the_rig_003.JPG


I would also like to Thank again...all those who have been involved up to this point of the project...you know who you are...and i appreciate all the Efforts and support!!

I would like to again recognize and Thank Mr Rick Reidl for the use of his shop equipment....Rick is a pretty cool guy to have around..not only a car guy...a great Landord...amd most of all...a good friend...Thanks Rick!!!

riddels_001.JPG


Thanks To

Ring_installation_002.JPG


for Piston Rings and all engine bearings.....

Thanks to.....

460_block_prep_010.JPG


Felpro Gaskets !!!....

Thank you to....

460_block_prep_009.JPG


Comp Cams!!! All available from our friends at......

460_block_prep_011.JPG


And for our General automotive needs we thank the folks at...

Buzz_s_460_upgrade_005.JPG


smilieFordlogo
 
Last edited:

taxreliever

Licensed to Represent!
14,695
287
Maine
Do we get to hear? :)

Sent from my not so smart phone using Forum Runner! :)
 

fatherdoug

Tonto Papadapolous
Ok Next....Doug here you go..a little timing chain/gear 101
Now ive lined up my cam gears mark bottom center..to coinside with the crank gears mark top center...Now the crank gear has three keyways 1 is for 4* retarded..the second is for "Straight up timing" the third 4* advanced...we will use the center keyway..being straight up timing and is identified with a dot above the keyway..this is the timing mark i will use to line up with the cam gear...

460_final_assemblie_011.JPG


460_final_assemblie_010.JPG


Once my marks are inline....I remove the cam gear...and complete gear chain instalation.....

460_final_assemblie_013.JPG


Now if you take close look ...we are in correct engine timing with our instaltion of our timing gear set..notice #1 piston is at TDC which is where it should be...The distributor will be installed later...pointing the rotor to the number 1 cap terminal...

460_final_assemblie_015.JPG

I'm a little late, Bob, but thank you. That helps.
 

Ford Truck Articles

Recent Forum Posts

Top